Update: We have posted a better recipe for snowskin mooncakes. Click the link to go there now!
After the success of our Pandan Spiral Mooncakes, we wanted to try our hand at making another kind of mooncake – the ping pei or “snowskin” mooncake.
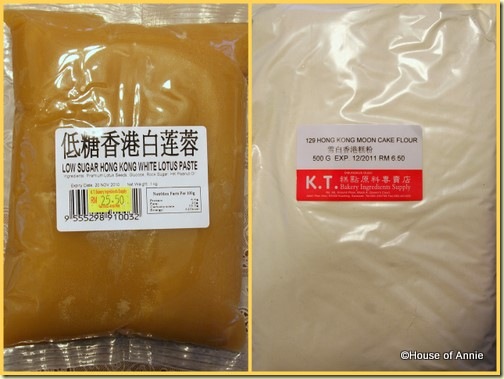
Snowskin mooncakes are not baked like traditional mooncakes are. Though the fillings may be the same (red bean, lotus seed paste, etc.), the outer layer of the cakes are made from glutinous rice flour and have the texture of soft mochi. This skin actually uses a special glutinous rice flour that has already been cooked to get rid of the raw taste. Annie picked up the packages for the filling and flour from our local baking supply store. The store also gave her a basic recipe for making the mooncakes.
Snowskin Mooncake Filling and Flour
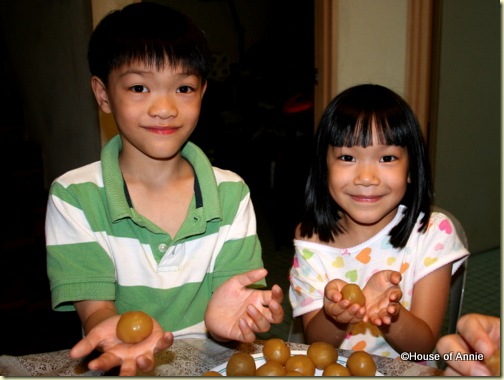
The kids got involved by rolling out balls of filling after Annie separated them into 30-gram chunks.
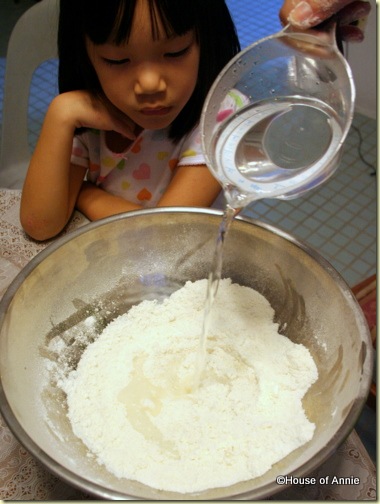
The basic recipe for the skin dough calls for 120 grams of the cooked glutinous rice flour, 50 grams of vegetable shortening, 120 grams of icing sugar, and 140 ml of warm water.
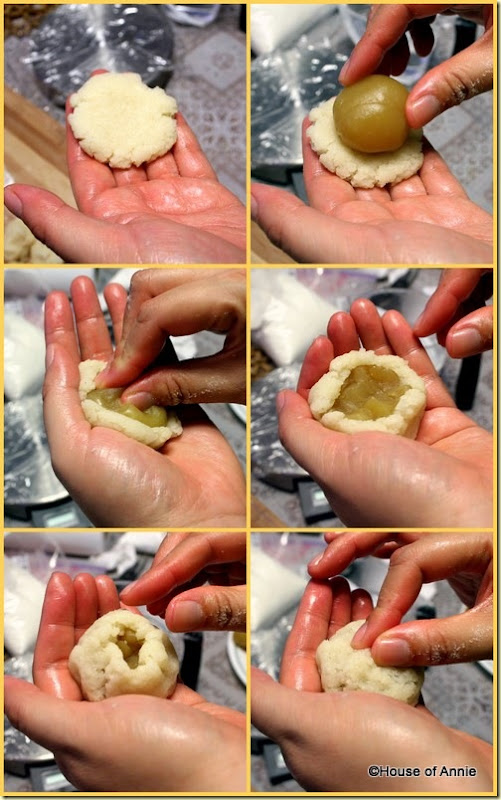
After stirring the ingredients together, Annie kneaded it until it became a large mass of dough. She then measured the dough out into 20-gram chunks. Taking a chunk, she rolled it into a ball, then flattened it into a disc. Then she placed one of the balls of filling in the middle.
By pressing the filling into the dough while also shaping the dough around the filling, she was able to stretch the skin around the ball and then pinch it closed. After rolling the closed off cake into a ball, she dusted the ball with a little of the glutinous rice flour.
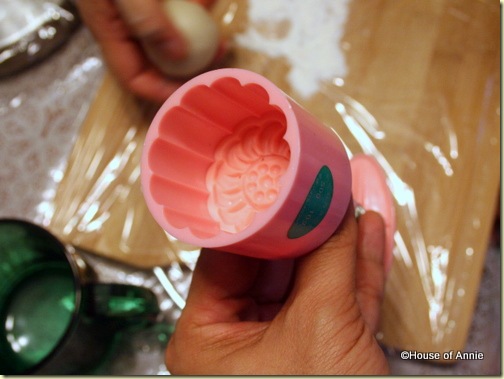
We had purchased this plastic, spring-loaded mooncake mold at the baking supply store. It can handle 50-gram sized mooncakes, and comes with four different interchangeable design plates.
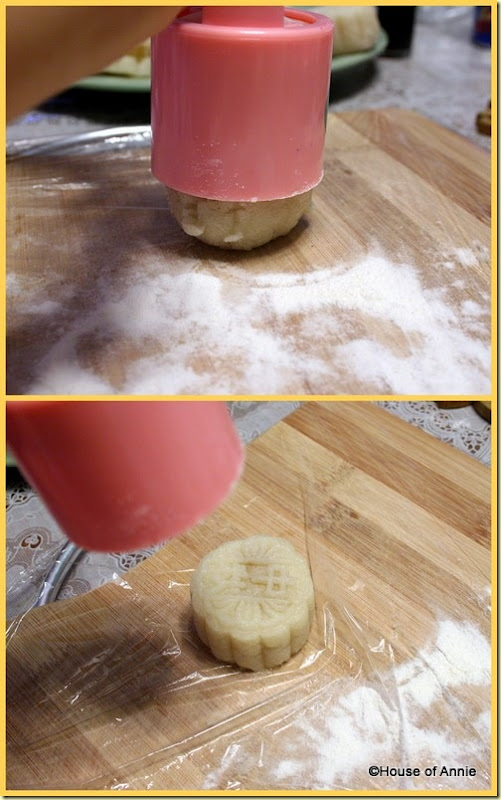
Placing the mooncake ball on a flat surface, you cover the ball with the mold and then press down on the plunger. The ball then receives its final shape and design. Lift up the mold, push the plunger all the way down, and out pops the completed mooncake.
You’re supposed to chill the finished mooncake for at least 20 minutes for it to set.
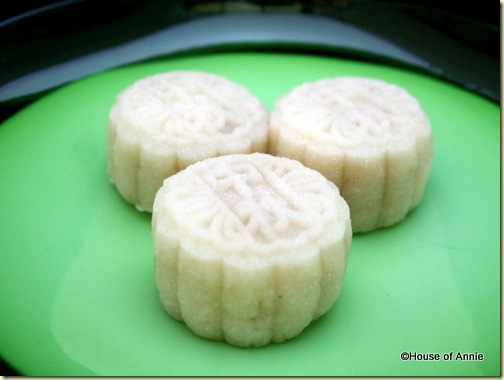
Not bad for a first attempt. It was pretty easy to put together. But we weren’t completely happy with the texture of the skin. It was too grainy for us. Not like some other snowskin mooncakes we’d seen on sale at the various shops around town.
When we went back to the baking supply store for more filling, we told the proprietor about our results. He said that this is how the basic recipe turns out, and gave us a few more recipes which call for more ingredients and a more involved process. We’ll try a couple recipes out and let you know our results!
Have you done snowskin mooncakes before? Care to share your recipe for a really smooth mooncake skin? Leave a comment (and a link if you have one handy) below!
Aloha, Nate
Love your gadget! The mooncakes are beautiful!
Not bad for a first timer…at least you guys dared to venture into making these…I am still scared to start but after reading so many mooncakes posts, I am now contemplating taking the plunge to try baking some for myself:D Thanks for sharing your experience, I’ll be back to check out your next posting, Cheers!
Jeannie,
these snowskin mooncakes are pretty easy to make. With the right ingredients and tools, I’m sure you can make some on your own. Have no fear! 😀
I have always wondered how these were made. It looks deceptively simple but I have a feeling that it will turn into unrecognizable lumps of lotus paste and flour if I tried messing around with my clumsy hands.
Paranoid Android –
I agree it does take a careful touch. But the good thing about these mooncakes is that if you make a mistake, you can eat it and no one will know! 😉
When we post about our next attempt at these mooncakes, I’ll include a video of the process.
These look wonderful! Has Annie moistened her hands, first, or should I go back to the other post on mooncakes? I’m not sure I would let anyone eat these after spending all that time making them! (Yeah, I would…) gonna have to locate an Asian market in my neck of the woods… thanks for sharing such great step-by-step photos…
Sharon –
Annie’s hands look moist because of the shortening in the mooncake skin dough.
Oh yep..moon festival is right at the corner…I made some last year…they were great with some tea.
Angie – yes, your ping pei and traditional mooncakes are very pretty. Have you done these spiral pastries before?
So THAT’S how they get the mooncake shape and design!
Jenny –
that’s the modern way, at least. The traditional way uses wood blocks with the design carved into it.
These look really pretty. I don’t think I’ve seen these snowskin mooncakes in the States. But I’ve seen some amazing mooncakes in your side of the world. Singapore especially seems to be really crazy with inventive mooncakes. Do you see a lot of interesing ones there? The idea of mochi-style skin sounds interesting, but I think I’d prefer the traditional baked versions just for the flakey skin! 🙂
Ben –
yes, being from Hawaii, I’m most familiar with the baked ones with red bean and salted egg yolk. There are lots of crazy flavors being sold over here in Asia, including durian flavors!
Your mooncakes look very festive and pretty!
I’ve heard so much about mooncakes but haven’t tried them yet! They are so pretty and look like a lot of fun to make!
Natasha –
this week would be a good time to try making some mooncakes!
your mooncakes look beautiful – I couldn’t tell it’s a first try. Every year I put off learning how to make mooncakes – maybe I’ll try next year haha
Wiffy –
Awww, c’mon! This is easy enough for a n00b! 😉
I came across a blog about someone who also tried to make the snowskin mooncakes. You can find her recipe here:
http://bit.ly/db8ccR
She also has another snowskin mooncake recipe, but said she preferred the 1st one. Hope the next try works out well!
Wow, homemade mooncake…love the mold 🙂 I never seen the snow skin one…
Your mooncakes still look so pretty though! Making mooncakes seem so hard to me hehe
Jen –
Actually I was surprised how easy these were to make…
That mooncake mould is very cool. I quite like the ping pei mooncakes. You’ve all been busy producing so many cakes. I think I may have to just buy some this year 🙂
Now you are making me wish I had picked up some of these mooncake molds during my vacation to Malaysia and Singapore in June. I did not realize that snowskin mooncakes are so simple to make. It does not even require steaming. I am sure Annie will find a way to smoothen out the texture of the snowskin 🙂
Snowskin mooncake? I have never seen the likes of these. I am really liking the mochi-like exterior. In fact, I’m thinking I might like that even BETTER than the baked versions.
Carolyn,
You might see some if you go to the Autumn Moon Festival this weekend in San Francisco!
You made pandan spiral mooncakes and snowskin mooncakes – how about pandan snowskin mooncakes? I love my snowskin mooncakes, nicely chilled , retaining the smooth texture of the snowy skin.
I like your website and all your posts. The best part is that you add pics of almost every step and that help a lot 🙂 Keep posting mouth watering recipes.
Beautiful! They look too pretty to eat. Thanks for sharing!
I want to try this too, maybe I’ll use another type of mould to experiment. Although the festival is over, I’ve still got some paste in the fridge, should be enough to try some of these.
may i know where can i get those plunger shaped mould?
Celyn – We got it at the baking supply store here in Kuching.
Hello, Thank you for sharing your recipe. Is there any way I can keep the mooncake longer? The skin start to harden after 2 days.
I used cold water instead of warm water and I let the mixer do the kneading first before I hand knead, it turned out smooth. The reason it turned out grainy is because of the sugar so it needs to be fully dissolved through kneading for a smooth texture. Also, I added flavorings so it definitely tastes better! Also, I think u used too much sugar…maybe u need to reduce it… I used 350g of sugar for 450g of cooked glutinous rice flour.good luck!! I am gonna be making some ping pei moon cakes this year too.
Hi, I’m from Hawaii (hard time finding lotus seed paste, only red bean available) and having a hard time with the skin, I have grainy dough and the dough does not stick together. Can you convert the recipe for snow skin moon cakes to american measurements? I’m having such a hard time! I mail ordered my mold, it is mini mold press with hello kitty and poo, can’t wait to try. Thank you for making it look so easy!
Rae,
we haven’t made snowskin mooncakes this year, so no chance to perfect the recipe. But we have learned from the expert that you need to rest your dough half an hour and then knead it until it becomes smooth.
Are you using the cooked glutinous rice flour?
Our mold measures the cakes in grams, so that’s why we also measure the ingredients in grams.
Good luck! Please let us know your results.
Do you know any place in northern DE where I could find ingrediants for mooncakes
Tammy,
I think you might have better luck to find these ingredients in Philadelphia’s Chinatown.