Happy Easter!
Spring is in full swing, and we will be planting Annie’s tomato seedlings really soon. I spent my Easter Sunday building a couple of raised garden beds / planter boxes in our backyard. Here’s a view of the first bed after I got done:

Let me show you step by step how I built my raised garden bed.
The Recipe
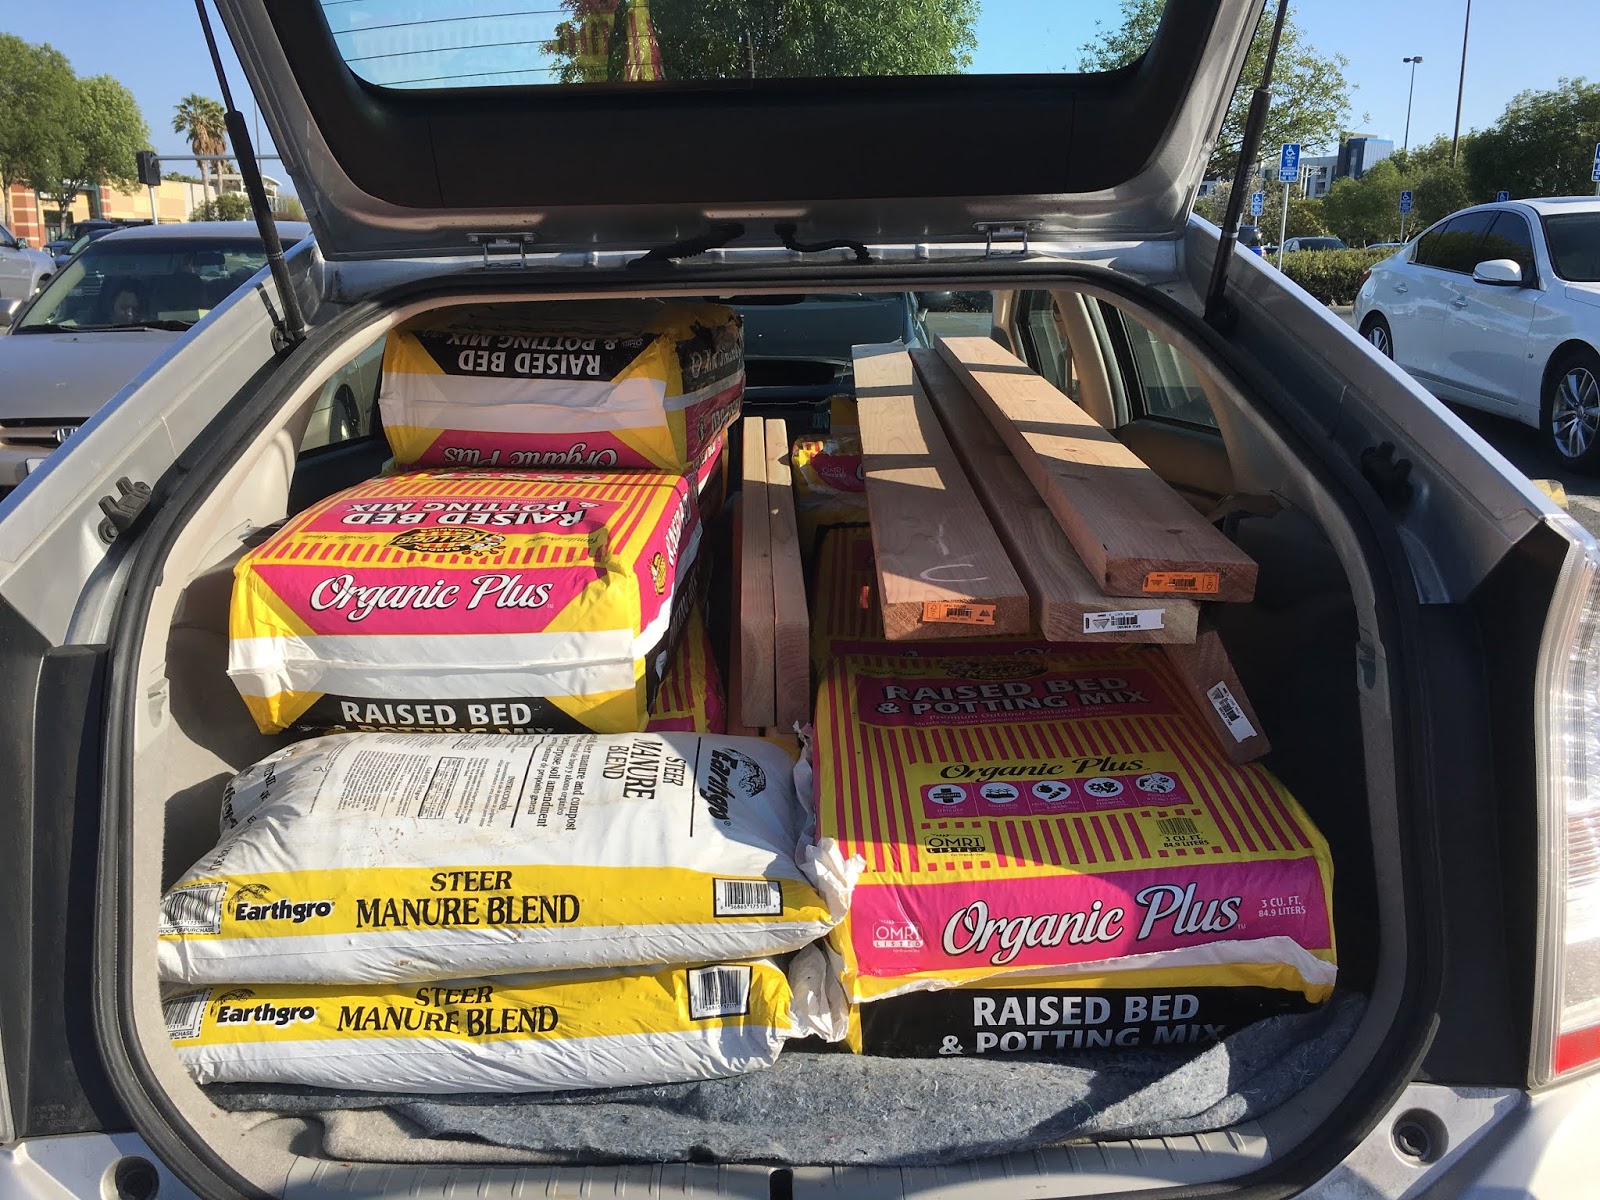
This is what you’re going to need to pick up:
6 ea. 2”x"6”x8’ untreated redwood lumber (2 of them will be cut into 4’ lengths).
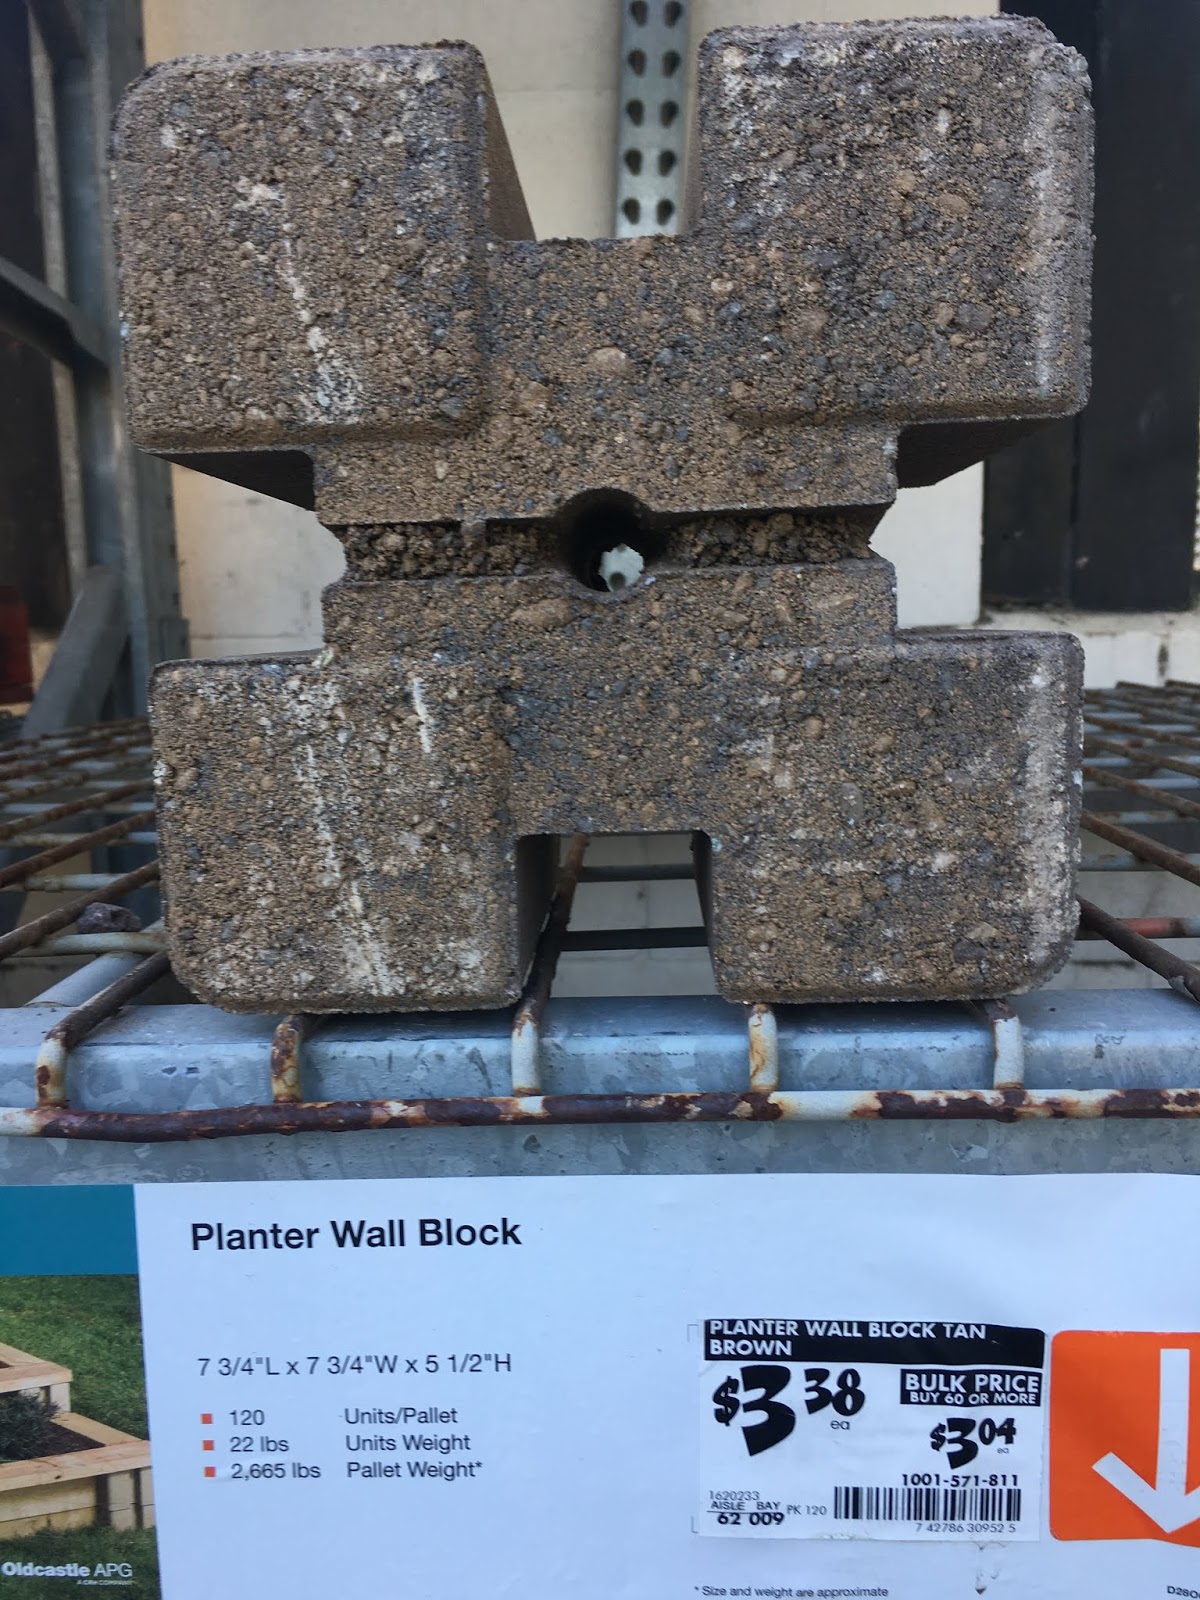
8 ea. Planter Wall Block:
10 ea. 3 cu. ft. Raised Bed Potting Mix
2 ea. 1 cu. ft. Composted Steer Manure
All told, this cost around $200 at my local Home Depot in Milpitas.
The Fit
I managed to stuff everything into my Prius with the front seat laying flat and both rear seats folded down:
Instructions
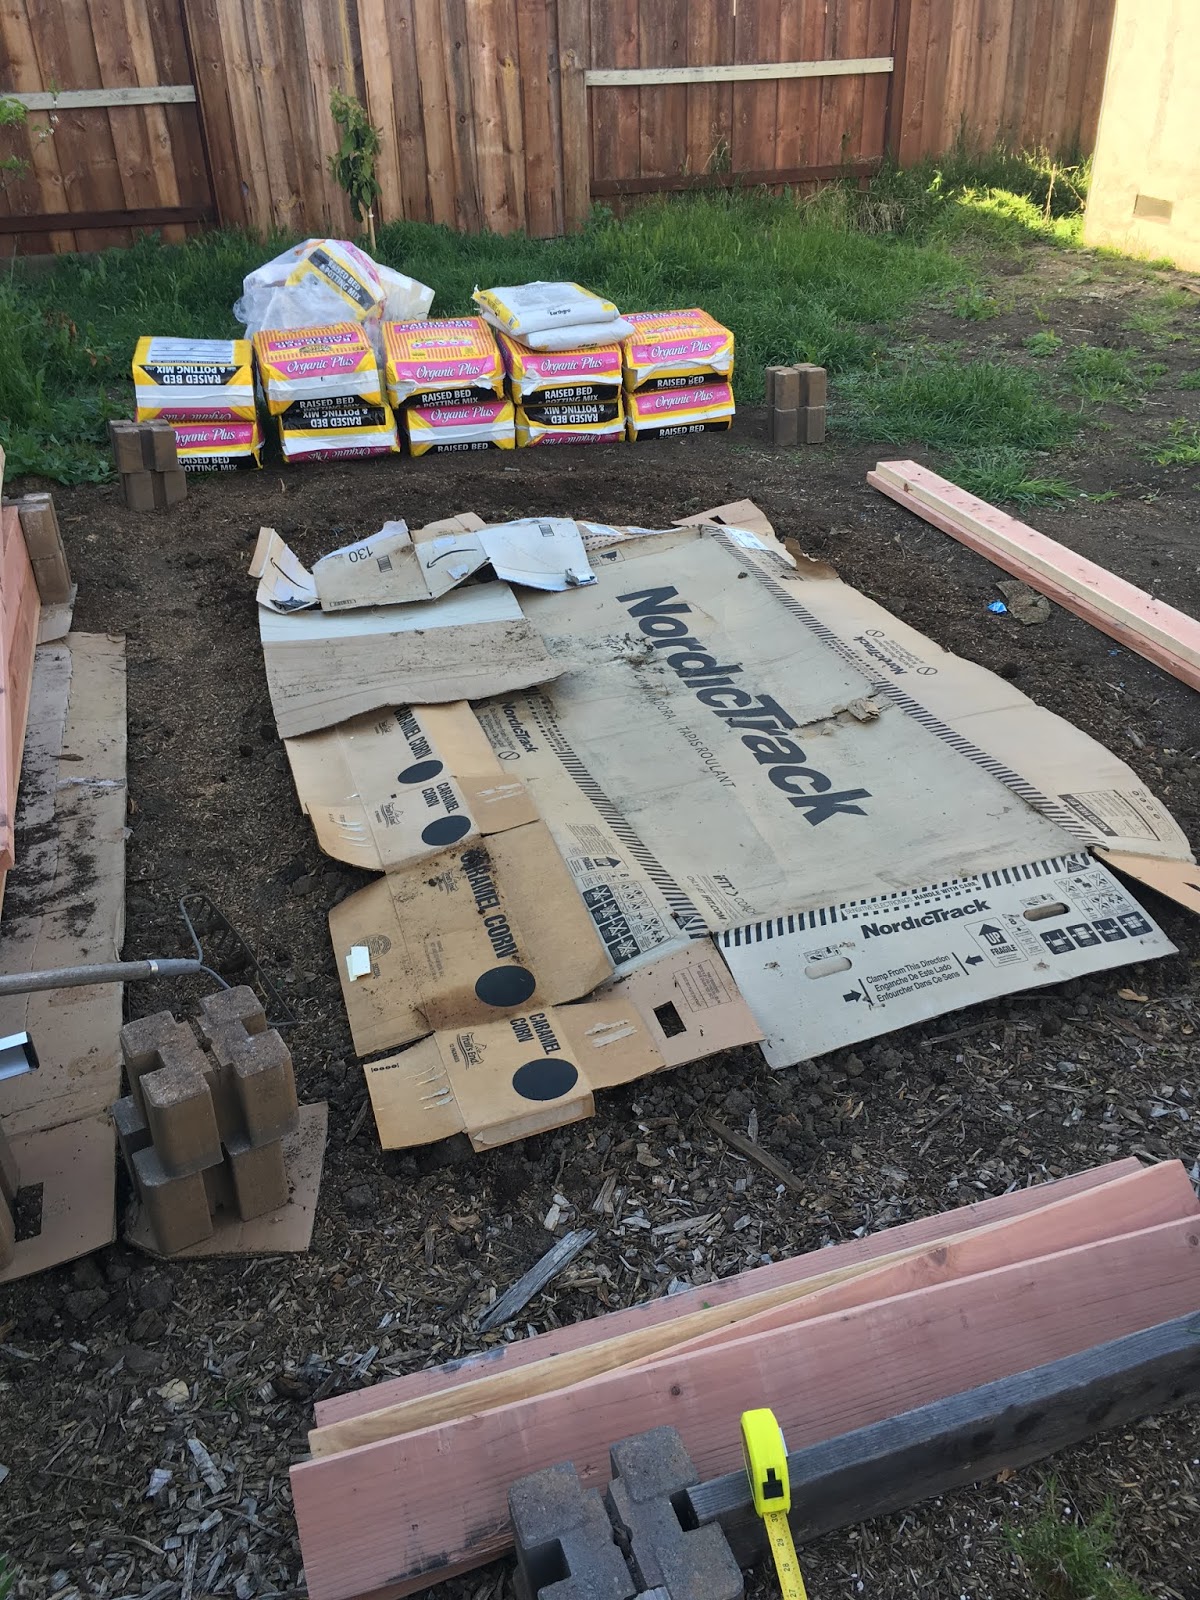
1. Clear and level an area larger than the 4’x8′ that the bed will cover:

2. Lay down cardboard or thick sheets of newspaper over the area:
3. Place the first Planter Wall block, insert a 4’ section, and connect the second block:
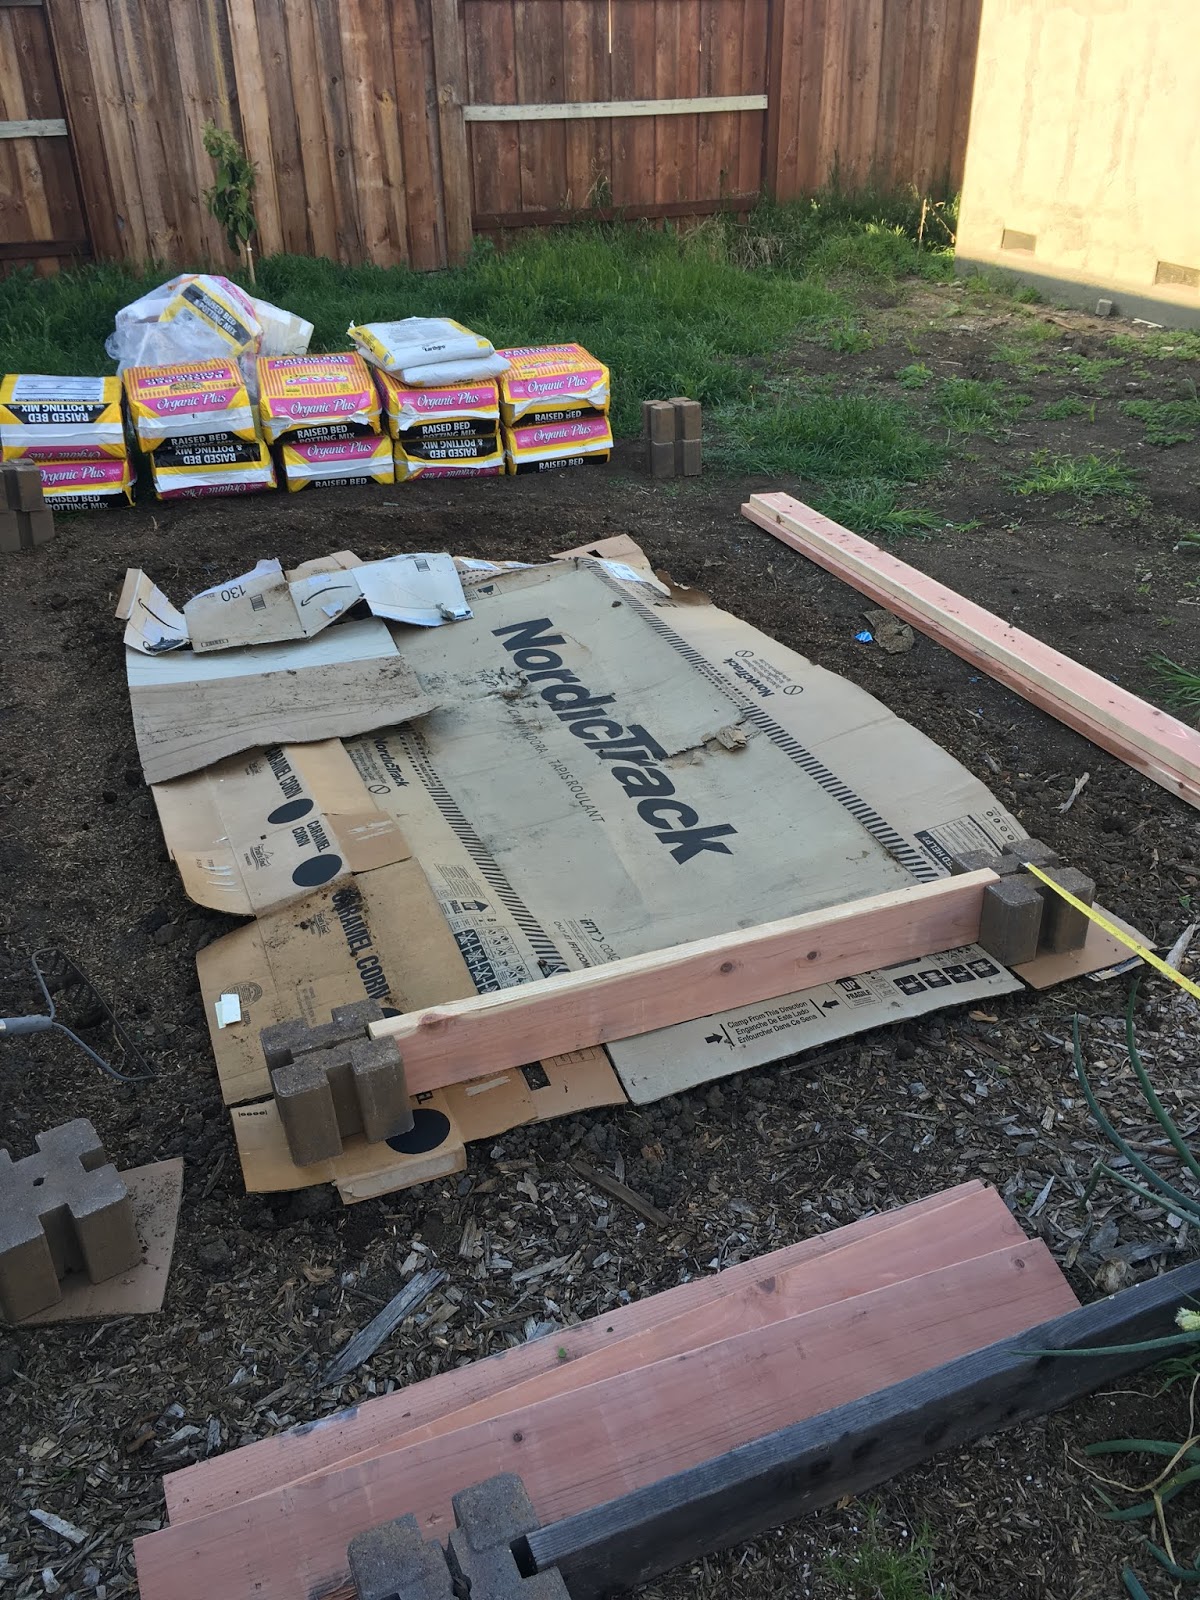
4. Now connect an 8’ section to the first block, then connect the 3rd block at the end:

5. Close off the rectangle with another 8’ section, another 4’ section, and then the final block:
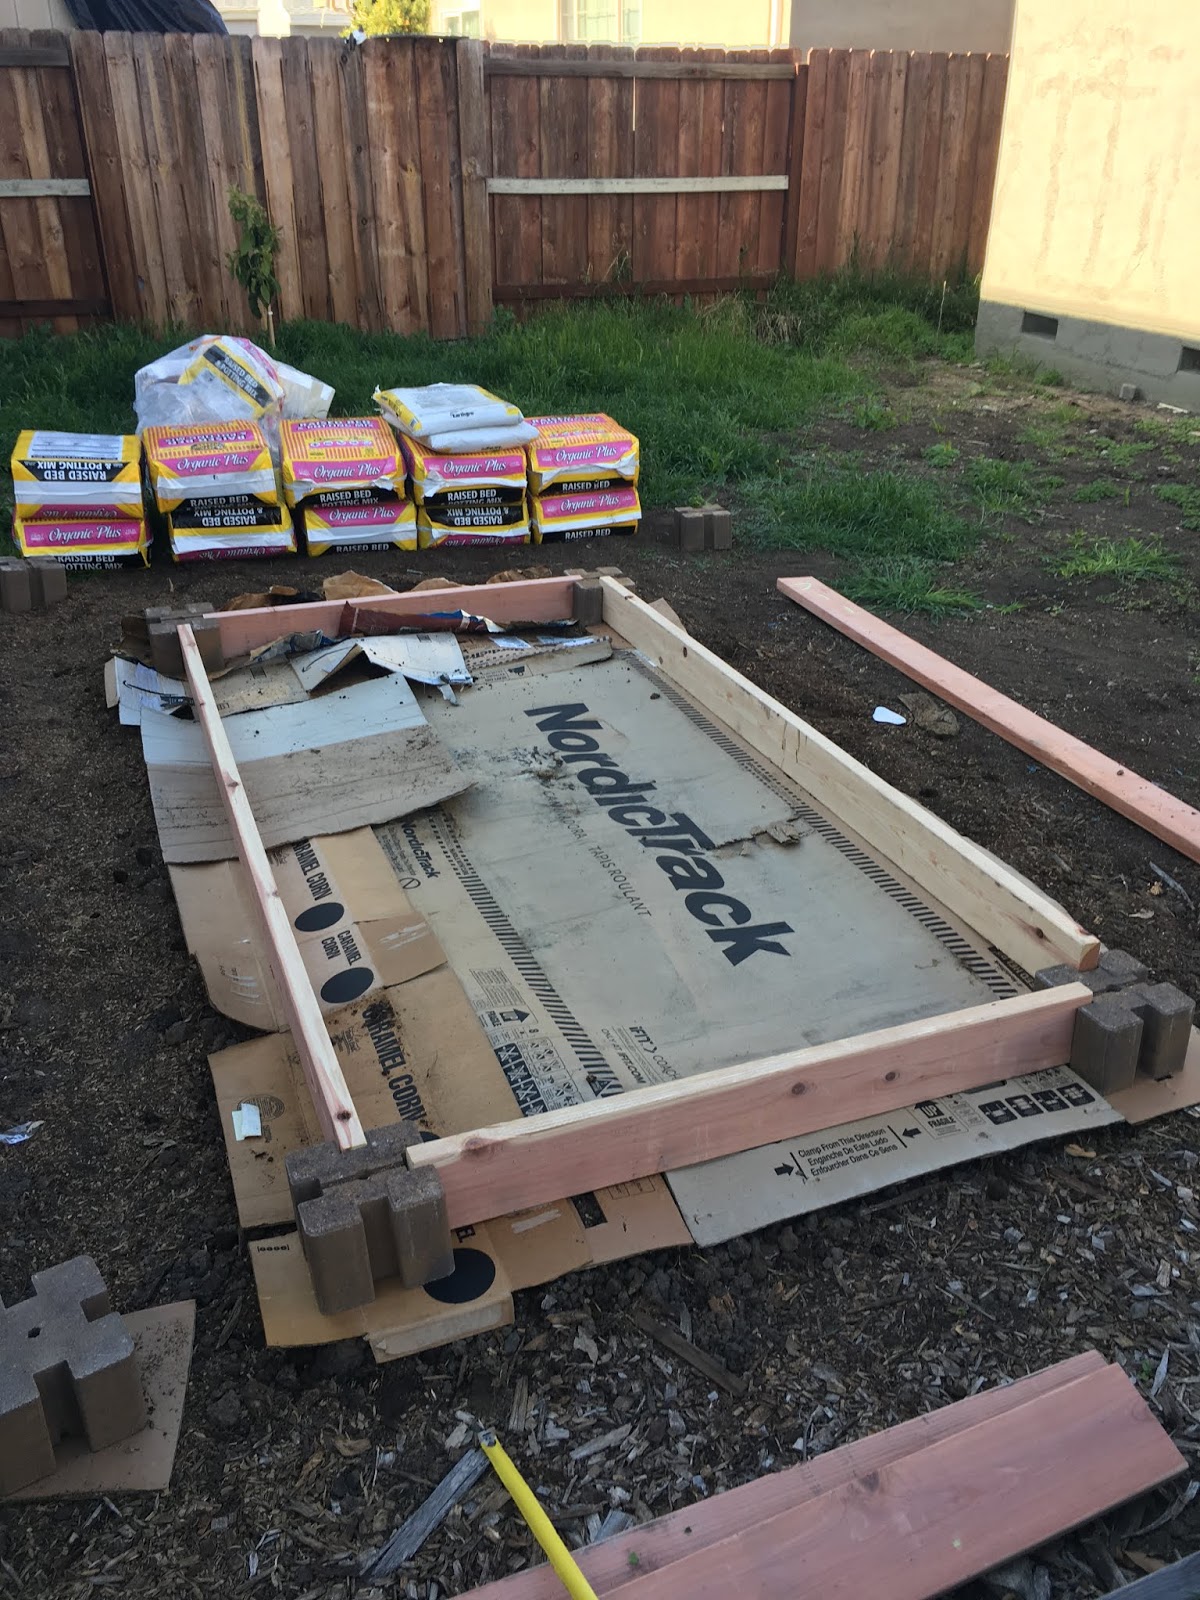
6. I checked to see if the boards were level. One side was off, so I had to remove the board and block from that side to level the dirt underneath.

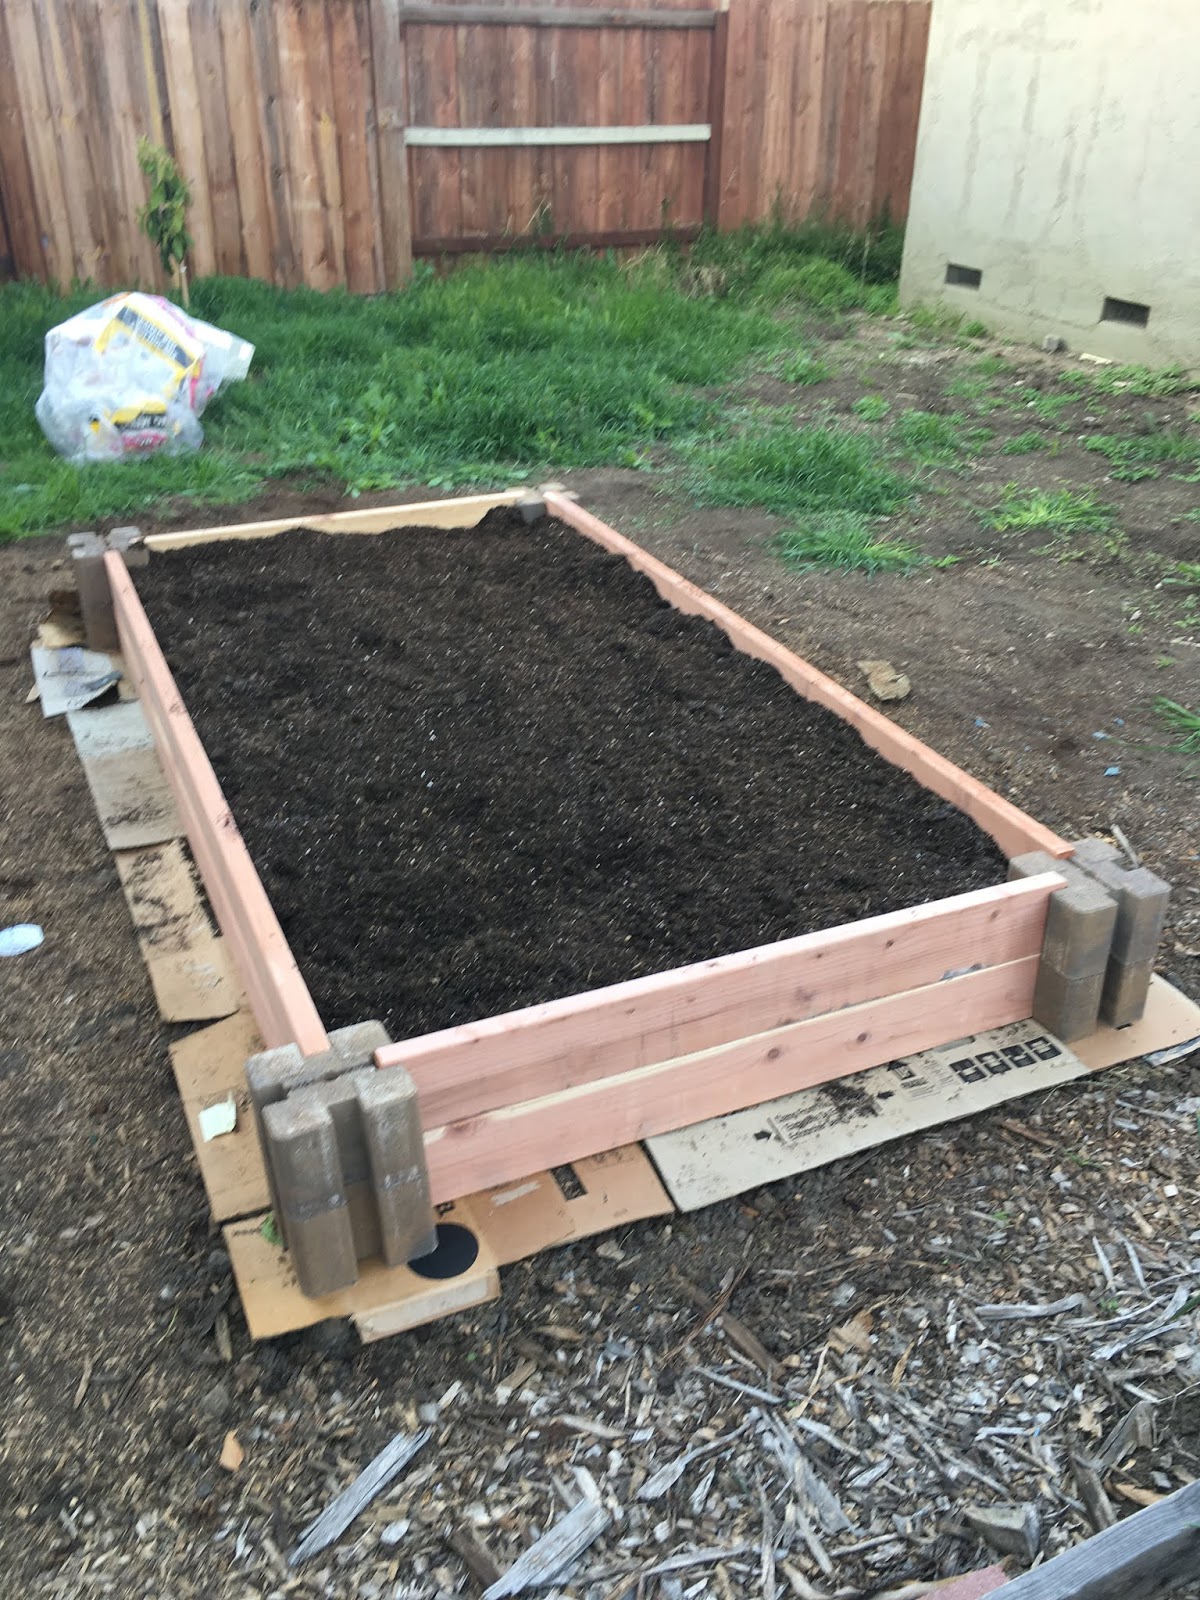
7. Drop the first five bags of soil into the bed:

8. Use a rake to spread out the dirt evenly throughout the bed:

9. Follow steps 3-8 to build the next level on top of the first one. Drop the next five bags of soil in:

Here is a close-up of how it looks:

10. Drop the two bags of steer manure in. Spread the manure out evenly with a rake.

11. Turn the manure under with a shovel. Rake everything level:
12. Stand back and enjoy your handiwork!

From shopping to finish, I think it took 4-5 hours to complete.
Discussion
There are tons of ways to build raised bed gardens. In fact, you don’t need to use wood or masonry at all – just pile up the dirt into mounds or rows and just plant in that. I’ve certainly done it like that before.
The reasons I like this style of bed are
- They look great.
- They are modular.
- They can easily be broken down if I want to change the size or configuration of the beds.
- They aren’t made of plastic or require the use of plastic sheets to prevent chemicals in the wood from leaching into the soil.
The major downside to this style of bed is cost. It’s a pretty hefty up-front investment.
The bags of organic raised bed soil is also pretty expensive. The soil is much cheaper if you buy it in bulk from a landscaping company. But the delivery fee makes it almost as costly as the bagged soil, and I’d have to move the whole pile myself one cart at the time to the backyard. No thanks. Convenience beats cost here.
Have you built your own raised garden beds? Leave a comment below and tell us how you did yours!
Aloha,
Nate
Hey, I built two of these beds and planted my summer crop. I bought what I thought was topsoil but it was recycled landfill soil. It had glass, rock and pieces of concrete, and weeds. I sent samples to our Agricultural Extension Lab here in Florida. It was okay soil just “dirty” with trash. So, it is imperative to use clean soil not junk soil. I had a lack luster crop season too! So, I am going to buy some soil remediation media from Profile. It should straighten out the junky soil and make a great soil once more.
Hal,
I do recommend buying raised garden bed soil (preferably organic) from a reputable seller. Topsoil (as you have found out) is generally low quality stuff – not useful for growing food. Sorry for your lackluster crop this year. Hopefully next year will be better. Good luck in the garden!
Over time the cardboard breaks down and the blocks shift. Then the boards begin to pop out, and the soil spills outwards. The initial amount of soil in the bed seems to be right the first year, but by the second the added bulk caused by decayed vegetable matter and roots worsens the problem. So now, when I set up a new bed, I hammer rebar down the holes of the blocks in all four corners, no matter how many blocks high they are stacked, making sure the rebar goes into the ground below the bottom block. Doing this has kept my beds in shape!
Lynn,
yes I have resorted to pounding rebar to secure the blocks. It adds to the cost but keeps the beds stable longer (sometimes they still move if the ground shifts).