(Update: If you’re looking for the Traditional Baked Mooncake Recipe, click here.)
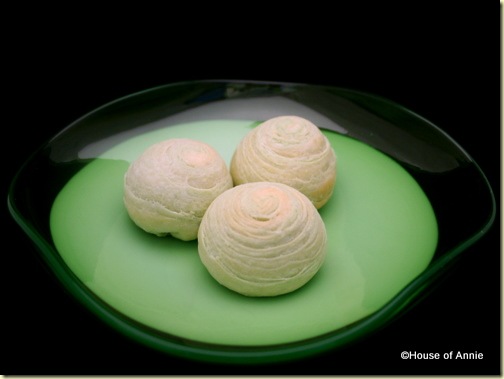
Just in time for the Chinese Mid-Autumn Festival, a special moon cake recipe that will make your head spin.
I have a friend here in Kuching who loves to garden. And since she lives next to an empty plot of land, she has put it to good use by cultivating it. When she mentioned that she grew purple sweet potatoes, I was hopeful that they were Okinawan sweet potatoes. I had to ask her if I could come by her house to help her harvest some.
Turns out she got really busy the weekend that we were going but she did dig up some to give to me. The ones she gave me were purple mixed with white and they were dry in texture. In some ways they reminded me of taro (yams) but a little sweeter. And later I found out that they were known as taro sweet potatoes. Well…that explains it…
Despite their dryness (or maybe because of it), I had the idea that I would boil them, mash them and then add some butter, milk and sugar and make them into a paste and use them as a filling for this pastry. After all, during the Mooncake festival, we find Shanghai mooncakes filled with taro which are very similar in size and shape to these pastries.
Superlative Spiral Sweets
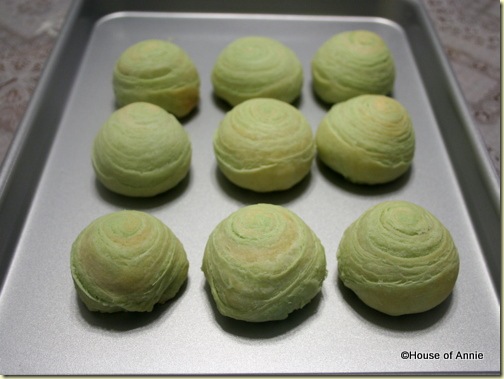
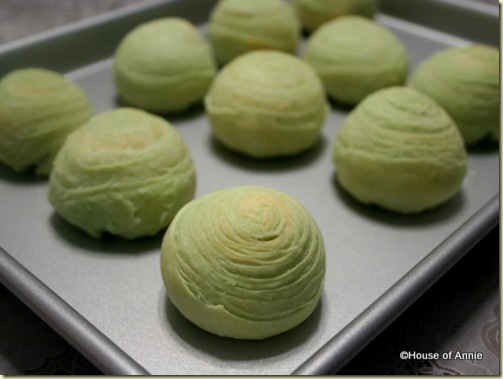
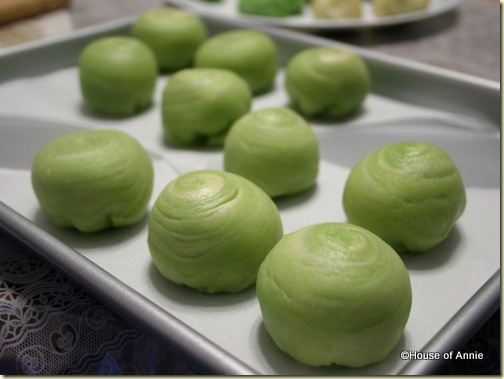
These spiral pastries (also known as Teochew mooncakes) are really wonderfully flaky and so light and delicious. It might look like quite a bit of work but if you follow the instructions carefully, they are not too difficult at all. And considering how beautiful they look, people will be so impressed and think that it was the hardest thing you’ve ever made when in actual fact, it isn’t too hard at all.
I must thank Angie from My Kitchen: My Laboratory blog who first showed me how to do this pastry. Unfortunately, she is no longer blogging—I was really sad when she decided to quit. This is why it is so important to support all your blogger friends and leave encouraging comments for them. This really gives us the motivation to keep plugging away at our blogs *hint*.
The Best Combination
So this spiral pastry recipe comes from her with a few adaptations from me. For those of you in the US, the flour that you use does make a difference to the way your pastries will turn out. The first time I made this, the only flour I had on hand was unbleached all-purpose flour. This did not work well and my pastries did not form nice rings like you see in the pictures here. I found that bleached AP flour worked better and actually if you can use cake flour (or a combination of bleached AP and cake flour) it will be even better.
The filling for this pastry is really up to you depending on what you want your pastry to taste of. I find that sweet potatoes that have been steamed or boiled and then mashed with some sugar and butter really works well. Go ahead and experiment with your fillings and report back if you get some really yummy combinations.
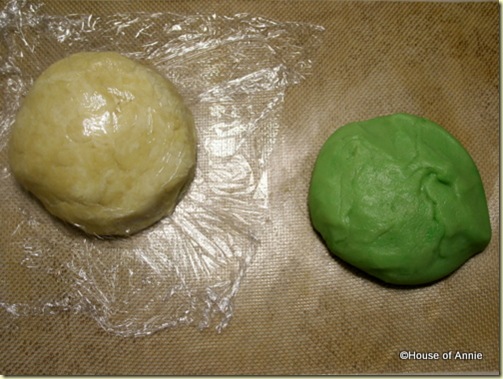
To get the spiral effect on this pastry, you need to use two types of dough (an oil dough and a water dough) that are layered one on top of the other. In order for this to work well it’s really important that both doughs are about the same texture and consistency. Adjust your oil/butter accordingly to get two doughs of about the same “feel”. It’s ok if the oil dough is a little bit softer but again, best if they are about the same. That way when you incorporate them, they will work together well.
Spiral Pandan Moon Cake Recipe
Prep time: 1 hour / Cook time: 30 minutes
For the Moon Cake Filling:
Ingredients:
300g sweet potatoes (purple ones preferable)—start with about 400-500g sweet potatoes unpeeled.
1/4 cup milk
2 oz butter
1/4-1/2 cup sugar (depending on how sweet your sweet potatoes are, just taste and add more sugar to taste)
1/2 tsp salt
Method:
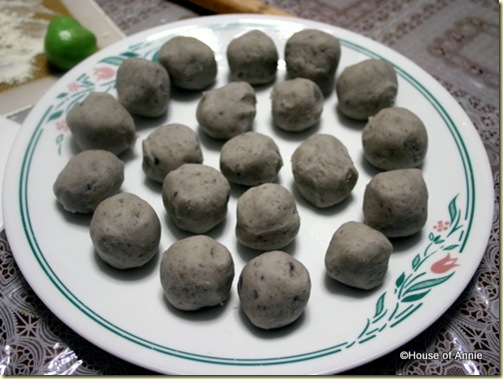
1. Boil sweet potatoes then peel and mash the sweet potatoes.
2. Add the rest of the ingredients to the mashed potatoes and mix till it forms a paste.
3. Roll out into 20 balls. Put aside while making the pastry dough.
For the Moon Cake Dough:
Ingredients:
Water Dough (A)
200g unbleached all-purpose flour
28g icing sugar
pinch of salt
80g cold butter
80g water
Oil Dough (B)
180g unbleached all-purpose flour
pinch of salt
90g oil (I use canola)
½ tsp pandan essence
Method:
1. For the water dough, sift flour, sugar and salt. Then cut butter into flour mixture using fingertips or pastry blender until mixture resembles breadcrumbs. Add in water and mix to form a soft, non-sticky dough. If it is sticky, you will need to add a bit more flour to get it to be the right texture. You should be able to form a soft ball that won’t stick to your hands. You don’t have to knead it. Cover and set aside to rest for 20 mins.
2. For the oil dough, sift flour and salt. Then, make a well in the centre of the flour and add in oil and pandan essence. Draw in the flour from the sides and mix to form a soft even coloured dough (same thing here, if it’s too sticky, add more dough till you form a soft ball that doesn’t stick to your hands). Do not over-mix. Cover and set aside for 20 mins.
To assemble and bake:
3. Preheat oven to 185 C or 350 F.
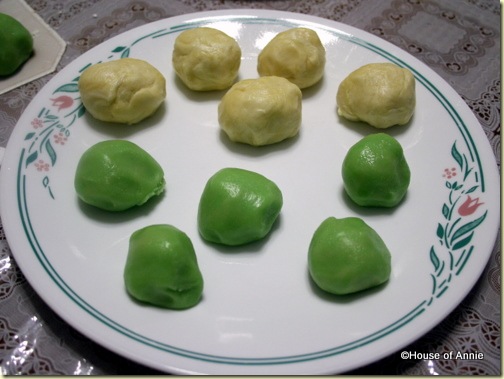
4. Divide A and B into 10 equal balls.
5. Taking one piece of (A), flatten and wrap (B) in it. Pinch to seal edges.
6. With the sealed side facing up, roll into a rectangle.
7. Roll up like a snail to form a ‘cylinder’, turn the cylinder 90 degrees, with the end facing up.
8. Roll again into a long thin strip.
9. Using a sharp knife or a pastry cutter, cut the cylinder in the middle into two pieces.
10. With the cut side facing down, flatten the dough, making the edges slightly thinner than the centre. I tend to leave a little hump in the center so that when the filling is wrapped around the pastry, the dough will be evenly thick all around (looks like a Mexican sombrero).
11. Wrap the filling and pinch to seal. Try not to ‘tug/pull’ too hard, otherwise the layers will tear. Best to flatten the dough larger than smaller so it’s easier to pinch. And when you pinch, you will find that the bottom looks ugly—don’t worry about it.
Here’s a slideshow on YouTube that I made showing all the steps:
12. Place sealed side down on lined baking tray and bake for about 30 mins until the top and bottom are a light golden brown.
Take a bite and enjoy the yummy, buttery, flaky goodness that this pastry is!
Cheers, Annie
Since we are using sweet potatoes from our friend’s garden, I am entering this post in the August 2010 “Grow Your Own” recipe roundup, created and hosted by Andrea of Andrea’s Recipes.
Never had these before. They look really tasty and that design is cute. Look a little like cream puffs.
@ Many thanks for sharing recipe ,I also like Making Pandan Spiral Moon Cake ,it’s delicous !
hello,..cute mooncake! erm,.. u dont use alkaline water meh??
Enul – no, this recipe does not call for alkaline water.
Thanks for your question!
Hi Annie, [Ed Lu told me to tell you I’m his wife 🙂 He sent me your site link and it’s an awesome site!] I have a question about this recipe: you said that bleached AP flour and maybe a mix with cake flour is best but the ingredients say unbleached AP flour? What would be the quantity/ratio of bleached AP flour and cake flour for optimum results? Thanks!!
Hi Carrie,
Nice to meet you here. Actually, I don’t think it matters too much. The softer your flour, the better the layers will look. I’ve used a combination when I ran out of cake flour but either all or just combining it with bleached will work well. Don’t worry about the ratio. Give it a try and let me know how it works for you.
Nice to meet you on here too! 🙂 Thanks for the tip – I can’t wait to try this out. It looks beautiful AND delicious!
Thank you so much for sharing the recipe. We love this cake A LOT!
I was just wondering because I don’t have any sweet potatoes, so could I use red beans instead?
Alicia,
thanks for commenting, and welcome!
Of course, you can use red bean paste as a filling.
Hi Annie,
Thanks for posting this recipe. I will give it a go. I have never been to Sarawak. I guess it should be a nice place!
Sook
These look awesome. I’m so afraid to try the traditional Asian recipes because my parents always say it takes a skilled person to make them. Can’t wait to try this and your mooncake one.
Julie
these recipes aren’t that hard if you already have some experience with baking. Let us know how they turn out for you!
These are beautiful! I’ve never seen mooncakes like these before, and was looking on the Web for pandan mooncakes. My mom bought one for me once, and it was the best mooncake I ever had. Thanks for sharing.
Hi Annie and Nate — I love your Blog and hope you still respond. I tried your recipe today. It turned out alright but the skin is not as flaky as they should be. I was having problem with the water dough. It seemed like the water dough was very dry and hard so when I did the second flattening, the green dough cracked making it very hard to handle. and when I baked, the layers didn’t flake up. I’ll try the recipe again but wonder if I should use butter/shortening instead of oil. Your thoughts? Thanks.
Hi Kim, I can only give you my guess as to what happened. Firstly, I’m not sure if you’re talking about the water dough or the oil dough that you found too dry. I think you’re talking about the oil dough (the water dough is the one with butter and water).
I’ve experienced the dry and hard dough you mentioned. This happened when I was first learning this pastry. Some problems that could arise from this are:
1. You didn’t use superfine (cake) flour. The flour really makes a difference in this recipe. When I switched to superfine flour, it worked a lot better.
2. You used too much flour and not enough oil. This is why weighing your ingredients is very important. Even a little bit more flour could make a difference. And even now when I’m working with it, I find that sometimes (depending on the flour batch I’m using), some will suck up more oil somehow and leave the dough dry and hard. When that happens, I add a little bit more oil and work it in till the consistency of the dough is similar to the water dough.
I hope this helps you to figure out what went wrong. I will say that even though my first few attempts were like how you described, they still turned out very tasty (just not as pretty to look at). Hopefully, you still got tasty morsels to eat?
Thank you for your response, Annie. Sorry for the confusion, it was the green dough that was dry. I invested in a kitchen scale and will make another attempt. Will let you know how it turns out. –Kim
Hi Annie.
BTW, my younger sister is Annie too. But we are ‘Tay’s.
Really enjoyed your YouTube.
You’ve made it look so simple!
I’ll give it a try this weekend!
Tyng
Sydney, Australia
Hi Annie: I have tried to make the moon cakes again with a scale and everything but I still was not able to get the flakiness in the dough.
Yesterday I made another attempt REPLACING the water dough with store-bought pastry dough. The skin came out very flaky, almost like the ones I had from the bakery. Now I need to work on rolling the cakes so they would come out a little nicer.
Thanks for your help!!
I wonder if I still have time to make this in time for the 12th? Thank you for posting. The video was very helpful too. 🙂
Murasaki-san,
these take only about 50 minutes to prep and 30 minutes to bake. You should have enough time to make them!
thanks for the recipe. u saved my mid-autumn festival 2011 in germany.
i tried different kinds of oil, olive and sunflower. and realised that olive oil comes out better. for the same amount, sunflower oil makes the dough too soft and messy…
Thanks so much for this recipe. I made it yesterday and it turned out beautiful. The video was very useful. Yey now we have something nice to eat for tonight’s mooncake festival!
Hi Annie, this is a fantastic recipe. It was my first time making mooncake and it was magical! It turned out to be really successful and satisfying. I have tried 3 different fillings such as red bean, lotus paste and yam…they all worked perfectly. I ended up making about 60 and shared with my friends and workmates. They were all thrilled!!! Thanks for sharing such a simple yet great result recipe – Joe, New Zealand
Hi, this recipe looks so simple and friendly – I’m really excited to try it^^ My boyfriend is from Taiwan, so I’m really excited to make some for him when I go to visit.
I’m especially excited to see which kinds of fillings I can get away with – cream cheese? coconut? chocolate?
Hi,
Just to clarify as I am planning on making these soon: do I make 20 taro filling balls, and only 10 EACH of the oil and water dough as the recipe states? Wouldn’t I need to make 20 each of the oil and water dough as each pastry has one taro ball + one oil dough ball + one water dough ball to be complete?
Actually, I read the directions more carefully and looked at the slideshow — I see that we cut the dough in half after rolling but before filling it. It all makes sense now!
Hi,
Thanks for sharing the recipe and showing steps. However, I have a question.. after you put the filling in, and wrap up, then you just leave that on the baking sheet and ready to bake? B/c when see the youtube clip, you only show the one you wrapped up..but not sure you have to adjust dough and filling to be able come out pretty flaky pastry? thanks
Hi Sweetpopcorn,
After you wrap the skin around the filling, you place it seam-side down on the baking sheet, then bake.
This recipe looks great andI look forward to trying the combinng of doughs for this effect.
However, I will definitely be using a flavour other than the pandan essence which you’ve web-linked in your recipe. Did you notice that Propylene glycol is the number one ingredient?!?
Hi SweetMia,
thanks for your comment. You are certainly welcome to use any flavoring you like. Perhaps you can even make your own homemade pandan essence!
What is so bad about propylene glycol? It’s Generally Recognized as Safe according to the FDA.
Looking for cake flour where can I find this type of flour in the States, and is icing sugar the same as regular white sugar? Thinking ahead to make for this year’s mid-autumn.
thanks for sharing. i finally know how to do flaky mooncakes.
Thanks for sharing the recipe and the thorough instructions and tips and youtube video Annie ! The pastries look awsome. I will show my Mom and together we’ll try this.
Bookmarking your site now. I very much enjoy reading your blogs…
Mina,
You’re welcome! Don’t forget to “Like” us on our Facebook Fan Page https://www.facebook.com/HouseOfAnnie